
Hallway Wall Sconce Height and Spacing Guide
For a typical residential hallway, begin with sconce centers around 60 to 66 inches above the finished floor and test spacing around 6 to 10 feet apart. Then adjust using the actual fixture's light spread, wall length, doors, artwork, corners and projection. A fixed interval cannot guarantee even illumination.

Draw the Hallway Elevation
Measure corridor length, width and ceiling height. Mark every door, corner, window, return vent, thermostat, switch, artwork and furniture item on a simple wall elevation. Add the junction-box center and complete fixture outline.
Hallways often look symmetrical on a plan but contain uneven wall sections. Choose whether the priority is even light, architectural alignment or a repeated visual rhythm. One layout may not optimize all three.
Establish the Mounting Height
Use 60 to 66 inches to the fixture center as an initial range in a standard-height hallway. Check standing eye level so an exposed bulb does not create glare. A tall fixture needs top and bottom measurements, and a projecting globe needs shoulder clearance.
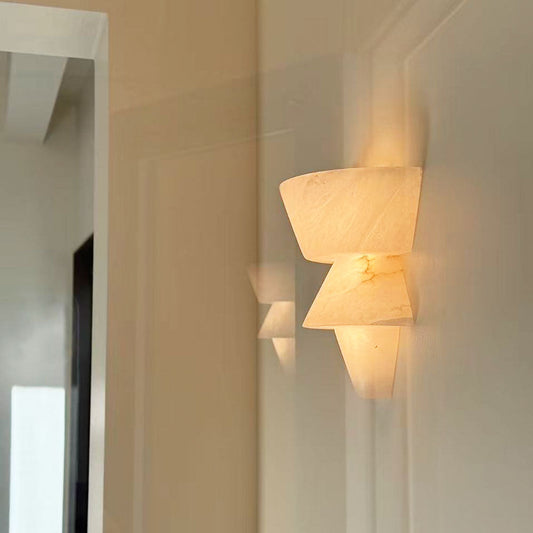
The Brass Alabaster Wall Light is a compact 7.87-inch-high example with a 3.94-inch-wide plate. The Tandem Wall Light is 18 inches high, so mounting both at the same center creates different top and bottom lines.
Estimate the Number of Fixtures
Divide the usable wall length by a provisional 6-to-10-foot interval, then plot actual fixture positions. Avoid placing a light too close to one end simply to preserve equal spacing. It can look better to use fewer fixtures with balanced end margins.
For opposite walls, decide between paired and staggered layouts. Paired lights feel formal and symmetrical; staggered lights can distribute illumination while reducing visual crowding in a narrow passage.
Adjust for Light Spread
Spacing depends on output and beam pattern. A broad diffused globe may create a wider pool than a narrow up/down light. Wall color, ceiling reflectance and ambient ceiling lighting also change perceived brightness.
Product descriptions rarely provide complete photometric data. Without an IES file or measured beam information, make a conservative mockup and avoid claiming that a fixed distance guarantees uniform light. An electrician or lighting designer can calculate critical circulation lighting.

Coordinate Doors, Corners and Artwork
Keep the complete fixture clear of door trim and open-door paths. Measure from the fixture edge, not only the electrical box. Near inside corners, check the side view and shadow pattern on the adjacent wall.
When sconces flank artwork, center the full composition rather than treating each light independently. Mark frame width, fixture width and the gap between them. Confirm that the bulb or shade does not reflect strongly in framed glass.
Check Projection in Narrow Corridors
Projection can matter more than width. Record the finished corridor width and subtract the projection of fixtures on one or both walls. Test the remaining walking path with furniture moving, shoulder bags and cleaning equipment.
Fixtures with rotating or swing elements require their maximum projection, not the folded position. Keep moving parts away from doorways and high-traffic turns.
Handle Stairs and Level Changes
For a stair hallway, measure from the tread line or each landing rather than from one floor level. Repeated fixtures can follow the stair slope, but every box should maintain safe clearance from people ascending.
Draw the railing, treads, landings and fixture projection in side view. Review the final layout with the installer before cutting boxes.
Treat Hallway Ends and Turns as Separate Zones
A long straight corridor and an L-shaped hallway should not use the same spacing calculation without adjustment. At a turn, the last fixture on one wall may already illuminate the beginning of the next section. Plot both walls together and check what is visible when approaching the corner.
At the hallway end, a centered artwork, console or doorway can become the focal point. Avoid forcing a sconce into the remaining gap if it competes with that feature. Use the end margin to create a deliberate stop in the rhythm.
Test Day and Night Conditions
Walk the corridor during daylight and after dark with the intended ceiling lights on and off. Note dark door recesses, floor-level obstacles and glare from polished surfaces. Decorative sconces should support safe circulation, but critical illumination levels may require additional ceiling or low-level lighting.
Confirm switch locations at every entrance to the corridor. A visually balanced fixture plan is incomplete if users must cross an unlit section to reach a control.
Hallway Layout Worksheet
| Check | Measurement |
|---|---|
| Total and usable wall length | ___ / ___ ft |
| Provisional spacing | ___ ft on center |
| First and last end margins | ___ / ___ ft |
| Fixture center height | ___ in |
| Fixture top, bottom and projection | ___ / ___ / ___ in |
| Door and corner clearance | ___ in |
| Paired or staggered layout | ___ |
| Light spread verified | ___ |
Tape every fixture outline before installation and view the rhythm from both ends of the corridor. Browse Wall Lamps and Entrance Hall Lighting, or use the Wall Sconce Height Guide for other rooms.
Tags:
Previous
Bathroom Vanity Sconce Height and Spacing Guide
Next
Table Lamp Size Guide: Height, Shade and Table Proportion
Related articles
Nature’s Geometric Light
Aug 16 2026
Organic Texture for Warm Interior Lighting
Aug 15 2026
Sculptural Light, Craft Timeless Home Ambiance
Aug 08 2026